Utilise the Moodboard Feature on Archify to Enhance the Efficiency of Your Design Process


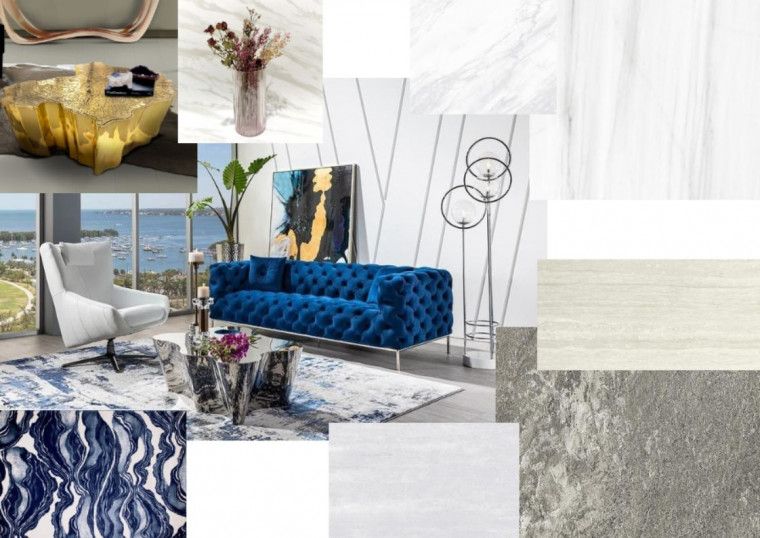
Moodboard is a visual presentation tool consisting of a collage of images, text, and object samples. It is an effective design tool for communicating concepts and building the vision of a design project.
Archify offers a Moodboard feature as an easy and efficient way to organise your design ideas. This feature can be used in conjunction with access to thousands of product specifications and inspirational images available on Archify. The materials can be added from personal collection as well.
The utilisation of the Moodboard feature in Archify is straightforward and accessible through various devices. Let's try using Archify Moodboard through the following steps:
1. Log in to your professional account to save your selected products
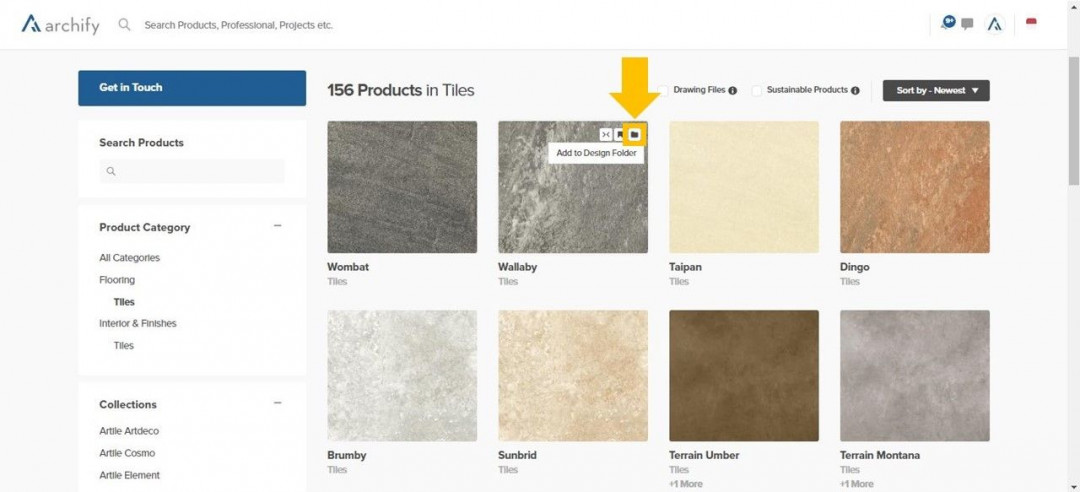
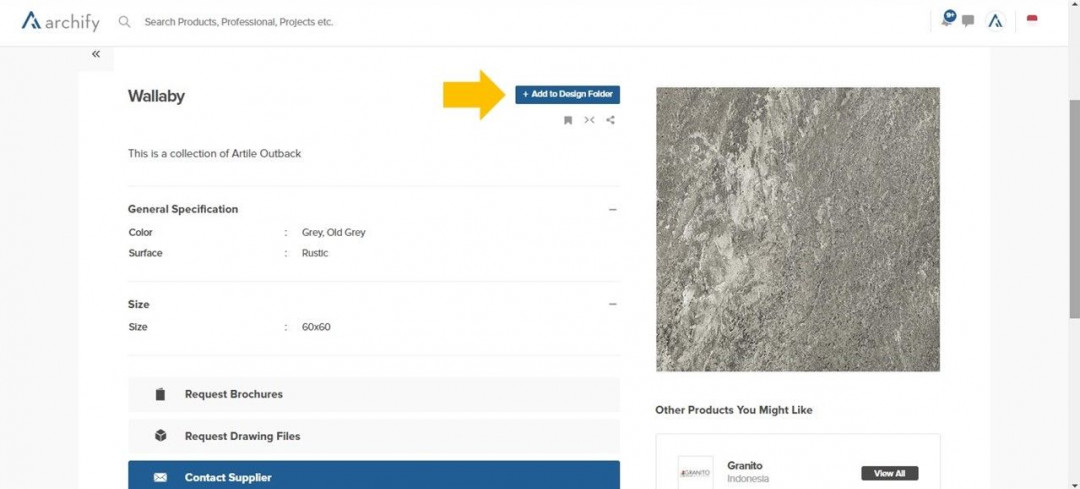
Collect your preferred products, materials, and design inspirations in your Design Folder by selecting "Save to Design Folder" on the top right-hand side of the product image. The "Save to Design Folder" option can also be found at the bottom of the product image after accessing the selected product page.
2. Create a Moodboard through the Design Folder
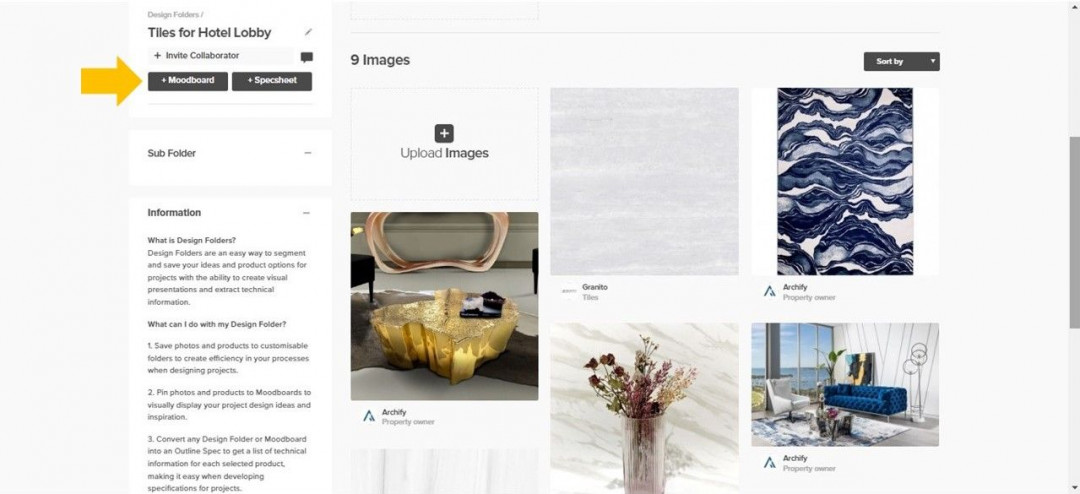
After collecting products to fill your Design Folder, return to the main page and access the Design Folder to view the collection of products you have saved. Next, select "Moodboard" on the left-hand side of the page.
3. Specify the size of the Moodboard
Select the desired dimensions of the Moodboard according to your requirements.
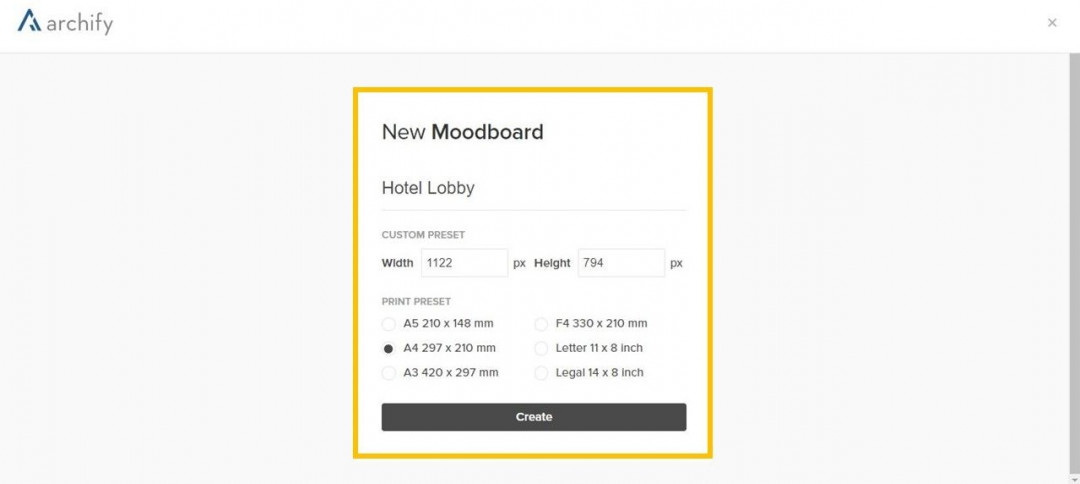
4. Select images from various sources to fill the Moodboard
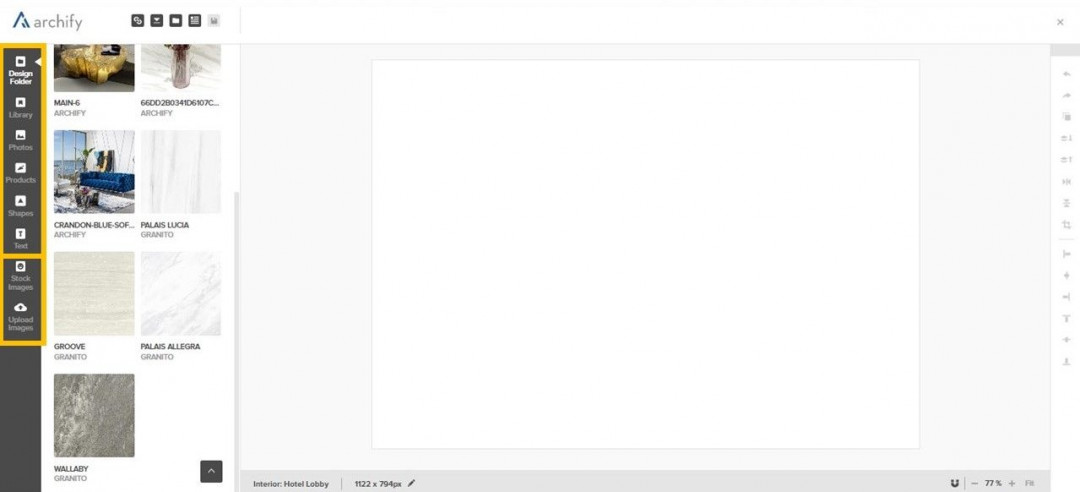
You can start creating your Moodboard on the available white canvas. Select photos and images available on the Archify platform by accessing the various source options on the left-hand side of the canvas.
Images can be selected from the Design Folder, My Library, Inspiration, or directly from the available product categories and subcategories. You can also search for specific products or brand names using the search field. If you want to use your own images, you can upload them via Upload Image. In addition, you are free to choose from the available Stock Images options.
5. Utilise the available editing tools
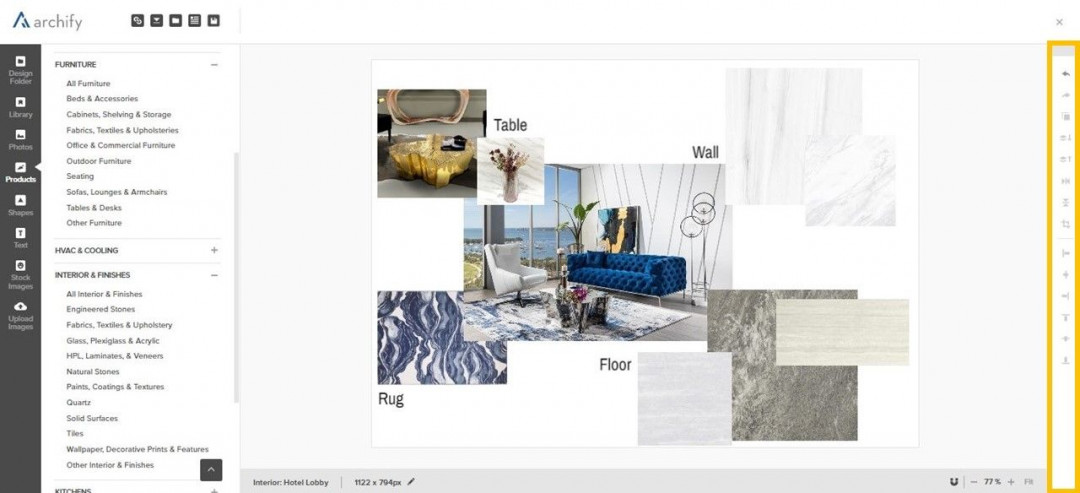
To edit Moodboard elements, you can use the tools available on the right-hand side of your Moodboard. Features such as undo, redo, duplicate object, move to back, move to front, flip object vertically, flip object horizontally, crop, and align settings are available to assist you in creating your Moodboard efficiently.
6. Save and process your Moodboard
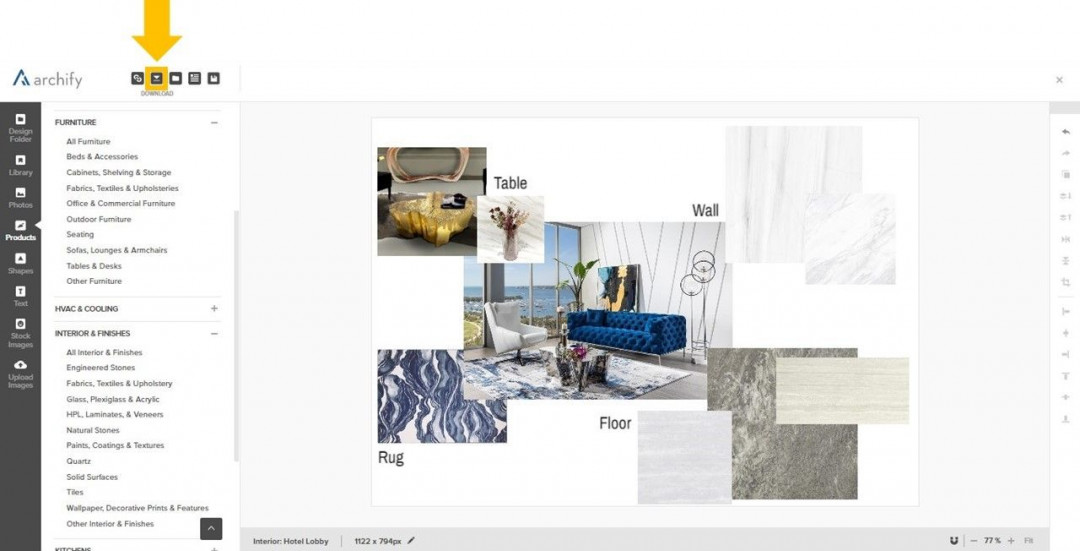
Select the menu on the top left of the Moodboard to save the Moodboard you have created. You can also download the Moodboard in PNG format or process the product data on the Moodboard into specification sheets through the Specsheet feature.
7. Share your Moodboard
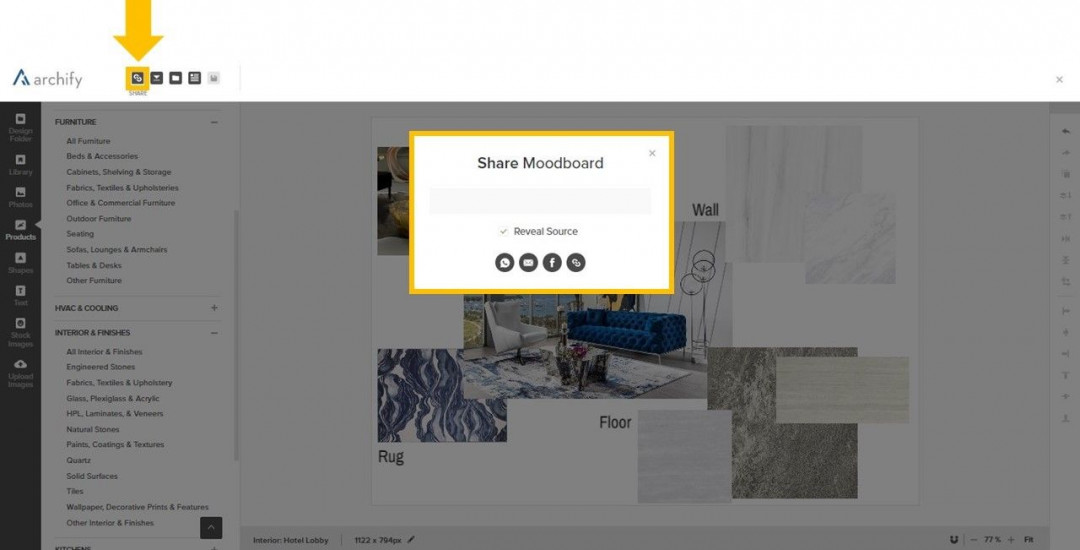
You can share your customised Moodboard with colleagues or clients via WhatsApp, email, Facebook, or through a personal link. Click on the "Reveal Source" option so that the product information used on your Moodboard can be accessed by your colleagues.


 Indonesia
 Australia
 New Zealand
 Philippines
 Hongkong
 Singapore


